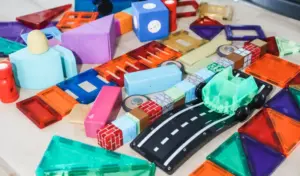
Even though I bought the Cricut bundle a mere two months ago (which came with a ton of crafting supplies), I’ve gone back to the Cricut website to make several more purchases. Did I mention I’m obsessed with my Cricut? I’m making something EVERY day!
Crafting costs can add up very quickly. And I wondered… are there any budget-friendly Cricut tool alternatives out there? What about generic, off-brand Cricut tools and materials that may even work better than the Cricut brand?
Spoiler: there are. Get ready for Cricut alternatives for adhesive mats, pens and markers, and heat transfer vinyl (HTV). PLUS, I couldn’t help myself… I’m including 5 bonus tips at the end that make Cricut crafting more cost-effective.
Cricut Adhesive Mat Alternatives (Most-Used Item!)
My Cricut adhesive mats are the most used items in my Cricut crafting. EVERY cut uses a mat.
I realized that over the course of my time with Cricut, I will be using a lot of mats. Are there any good, inexpensive alternatives to the Cricut mat?
The answer is YES!
- Cricut mats on the Cricut website: $16.99 for 3 mats
- $5.66 per mat
- Cricut mats on Amazon: $8.35 for 2 mats (Amazon prices do fluctuate)
- $4.18 per mat
- Nicapa Mats on Amazon: $11.69 for 3 mats (Amazon prices do fluctuate)
- $3.90 per mat

I compared the Nicapa mats to the Cricut ones in several categories:
- Stickiness
- How well it released paper
- How well it cleans with baby wipes
- How well it held various materials (paper, vinyl, glitter vinyl)
- Ease of repositioning cardstock
In all categories, the Nicapa Mat performed just as well as the Cricut mat – and it’s cheaper.
Keep in mind that if you use an off-brand cutting mat in your Cricut machine, you could void the warranty on your machine. You might want to wait until the warranty has expired before switching to a cheaper alternative and ALWAYS put the protective clear cover back on your mat when it’s not in use!
Cricut Pens & Markers Alternatives
Want to write anything on the beautiful cards you create? I do! All of your paper art projects can look so professional if you use the text feature in Design Space and put a pen in your machine to write or draw.

Cricut has MANY options for various colors, metallic, gel, marker, and fine tip pens. But, they can be expensive. Are there any alternatives? Absolutely, there are!
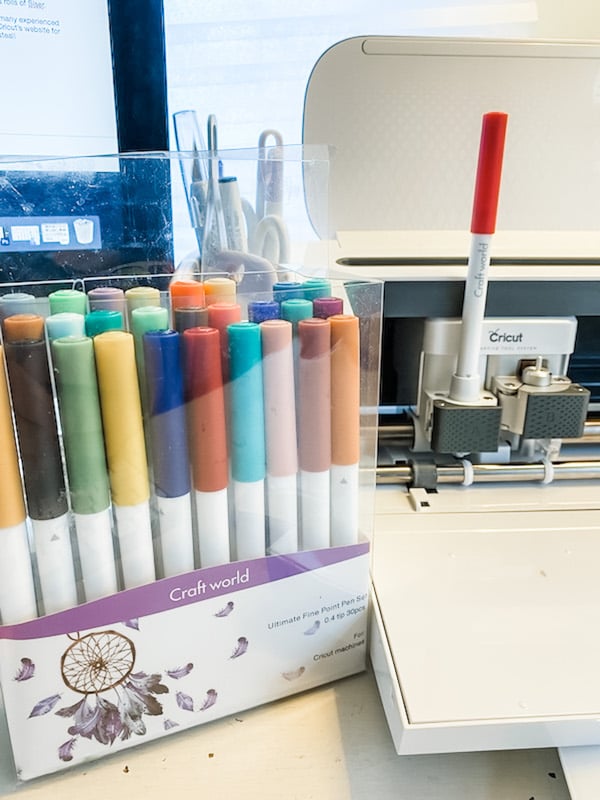
- Cricut Ultimate Fine Point Pen Set on the Cricut website (30 ct.): $34.99
- Craftworld .4 Tip Fine Point Pens on Amazon (30 ct.): $19.99
I’ve used these Craftworld Pens in my Cricut Maker and they have worked perfectly! Great colors, too.
The Cricut Maker bundle came with the Cricut black .4 point pen, and I use it regularly. I honestly can’t tell a difference between the black from each manufacturer. This set does not require an adapter. You just put them in the clamp, listen for the “Click,” and go!
And here is an Amazon alternative for the Cricut markers:
- Crayola Fine Line Markers on Amazon (12 ct.): $4.99

For the Crayola markers, there will be no “click” when you place them in the clamp. It will just hold tightly in the pen holder. DO NOT try other Crayola Markers, they will not fit into the clamp.
To determine how far to push the Crayola marker into the holder, use a piece of tape to mark the height of the Cricut pen in the Clamp A. Then, press the two markers side by side on a sheet of paper, add tape to the Crayola marker at the same height as the one on the Cricut pen.
Gently insert the Crayola Marker into the Cricut pen holder until the tape is at the right height. NEVER FORCE THE PEN HOLDER. The clamp should not be hard to close.
These Crayola markers seem most similar to the 1.0 tip markers, NOT the .4 fine tip Cricut pens. The only difference is the black is not as intense in the Crayola Marker. If you need fine writing, these will be too thick a tip.
Warranty warning: If your Cricut is still under warranty and you break the pen holder (Clamp A) using a product other than a Cricut product, Cricut may refuse to replace it.
Cricut Heat Transfer Vinyl (HTV) Alternatives
Did I mention earlier that I love making iron-on t-shirts?
Check out this article: DIY “Two the Moon” Iron-On: 2nd Birthday T-Shirt Cricut Project

Personalized t-shirts are so easy to do, and in the past, I had to order them online and pay MUCH more for them. Two years ago, I bought my daughter’s family Disney-themed t-shirts. Boy, do I wish I had my Cricut back then!
Not only is it cheaper to do myself, but I really enjoy creating something that is SO practical and will get used by my family members or friends.
Heat Transfer Vinyl is very easy to use. Since I plan on doing many more t-shirts and would like to make other iron-on items, I want to find the BEST product in vinyl. Here’s what you need to know about vinyl.
There are three kinds of Vinyl:
- Removable Adhesive Vinyl: Use for wall decals, interior decorations, and temporary signs (rated removable up to 2 years). This vinyl is matte.
- Permanent Adhesive Vinyl: Use for outdoor signs, car decals, tumblers, glasses, and dishes (think waterproof – most rated to last 6 years). This vinyl is glossy.
- Heat Transfer or Iron-on Vinyl: Use for hats, t-shirts, jackets, canvas totes, signs, and flags (think putting on fabric).
I haven’t yet made any projects with Removable or Permanent Adhesive Vinyl, so I’ll hold off on my suggestions for those two.
Iron-On Vinyl Alternatives
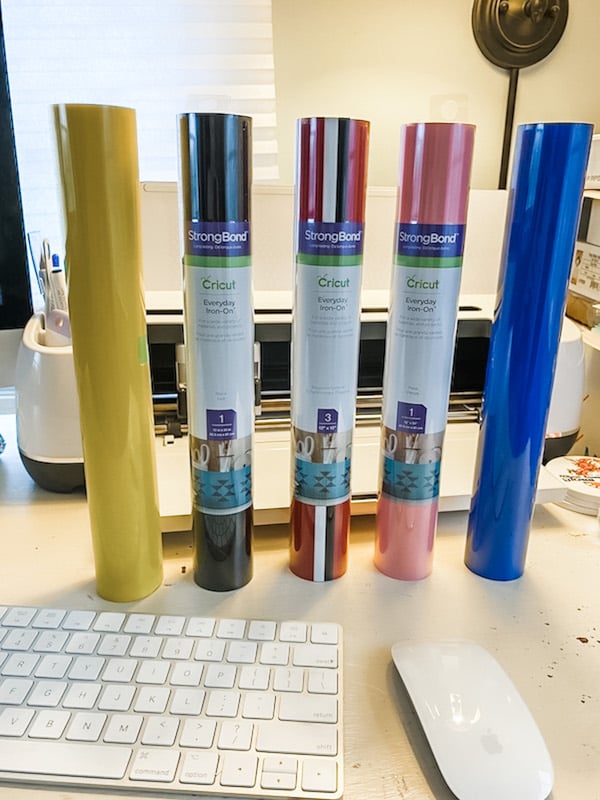
The Cricut brand for Heat Transfer Vinyl isn’t actually too expensive, and there are often big sales on the Cricut website to bring the price down. Here are some quick links to the Cricut HTV along with the pricing:
- Cricut Premium Heat Transfer Vinyl, Everyday Iron-On, 1 roll (12” x 24”) on the Cricut website: $11.99 (often on sale)
- Cricut Bulk Premium Vinyl Value Pack (40 ct.) on the Cricut website: regularly $114.90, reduced to just $16 (!!!) at the time of this writing (please check the link for current pricing)
When it comes to iron-on vinyl alternatives, I think the real issue comes down to quality instead of price. Every Cricut user that uses a Heat Transfer Vinyl other than the Cricut brand uses Siser EasyWeed. I really do mean EVERY Cricut user!
I personally haven’t used this product yet, because my Cricut bundle came with some Iron-On Vinyl, and I’ve used it with great success. However, reviewers of both products often mention that Cricut HTV doesn’t hold up well on shirts that are worn and washed a lot, but it does work fantastically well on mugs, canvas, wood, and other surfaces.
If doing shirts, the advice I’ve seen says use Cricut’s stretch HTV, but again, that’s more costly. Siser Easyweed has great reviews on shirts and other wearable materials like shorts, pants, and headbands.
And when it comes to ease of weeding, Siser wins this one by reviewers. Though there are even cheaper HTV brands out there, Siser holds the title for easiest HTV to weed. Taking out all those little pieces of fine details and lettering in your projects can be tedious with the wrong product.
When comparing pricing, be sure to take the roll size into account. Cricut’s roll is smaller at 12” x 24” whereas Siser Easyweed is 12” x 36”.
Here are some options for purchasing Siser Easyweed:
- 143 Vinyl: 5 sheets (12” x 12”) of the colors of your choice $15.50 (+$6.95 flat rate shipping), they also sell rolls if you want more of individual colors.
- Amazon: 5 sheets of the colors of your choice for $21.45. Amazon also sells rolls of Siser.
- Michaels: 1 roll is $12.99 PLUS you can use their 20% or 25% off coupons.
Honestly, for my next t-shirt project, I plan on buying Siser Easyweed. If so many experienced crafters recommend it, I think it’s worth a try.
I will probably keep watching Cricut’s website for sale items, though, that bundle pack of premium vinyl sheets right now is a steal!
Bonus Tips & Tricks to Make Cricut Accessories & Materials Last
Yes, buying cheaper alternatives to expensive Cricut accessories and materials is probably the best way to craft on a budget. But you can also extend the life of your supplies with a few little tips and tricks!
Cleaning Your Mats

Take a baby wipe (make sure it has NO alcohol in the ingredients), and in small circles, gently wipe the mat. It will be wet when done. Let it dry completely. It won’t feel sticky at all while it’s wet. The stickiness will return when it is completely dry.
This is great to remove dust, debris from paper, and especially felt. Make sure NOT to rub so hard that you remove the adhesive completely from the mat. This helps restore your mat, but it won’t make it brand new.
If you’re cutting fabric, use a lint roller on your fabric mat to take off lint afterward.
And ALWAYS put the protective sheet back on your mat when it’s not in use. Giving longer life to your mats is certainly a great thing!
Storing Your Pens and Markers
Is your Cricut pen not writing well? Don’t toss it just yet! The pens all come with the tips stored up, so try storing them tip down and let the ink settle down; then try again. The exception to this is Cricut gel pens – store them horizontally to keep the ink from leaking out.
When writing or drawing with your Cricut, store the cap on the pen while it is in the clamp so you don’t lose it. And as soon as the pass is done, recap your pen and store it tip down.
Maintaining Your Fine-Tip Blade
I learned this tip from Jennifer Maker, a very experienced crafter, and I do it regularly.
You can’t really “sharpen” the fine-tip blade, but you can clean debris off of your blade and give it a much longer cutting life!
Take a 12-inch sheet of aluminum foil and wad it up in a ball. Take your fine tip blade IN the housing out of your Cricut machine. Depress the blade by pushing on the end of the housing and punch it into the aluminum ball about 40 times. Be careful not to stab yourself! Put the blade and housing back in the Cricut machine.

This will help your blade make clean cuts and remove anything from previous cuts. Do this after 4-5 cuts.
Cut a Second Time to Avoid Paper Waste
Have you ever cut out an intricate design on cardstock and taken it off your mat only to find that the blade didn’t cut completely through the paper? Then, you are stuck using a craft knife to slowly and tediously cut through each and every place the blade didn’t fully cut (or you scrap the paper and start over).
I’ve spent an hour cutting through a tiny but gorgeous design for a wedding card that didn’t fully cut through. But I really wanted to use it!
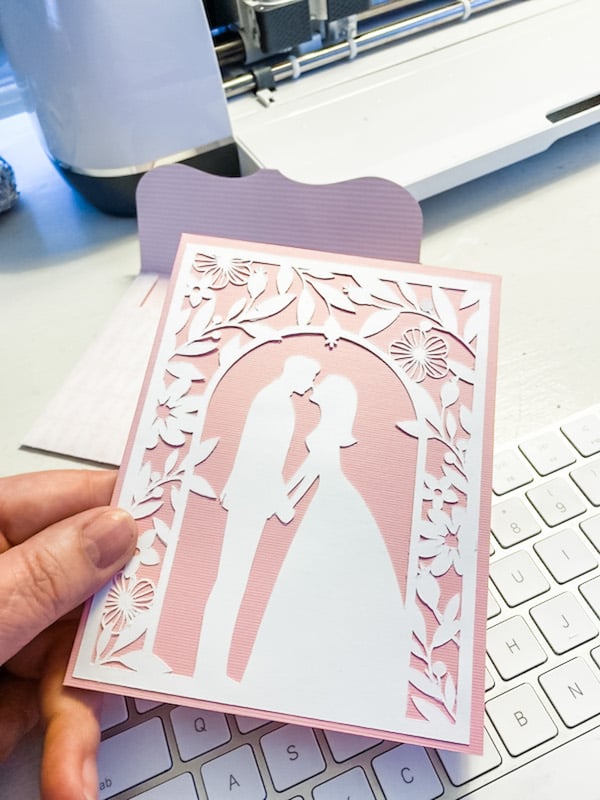
The key to fixing this is don’t unload your mat from the cut. Rather, before unloading your mat, press your “C” button again. This will pull the mat back in and recut the design exactly as it did the first time.
Remember: do this BEFORE you unload your mat. You don’t have to do anything special beforehand – just check your cut before you unload and recut if it needs to go further. I sure wish I’d done that with this card!
Weed Vinyl On Your Mat
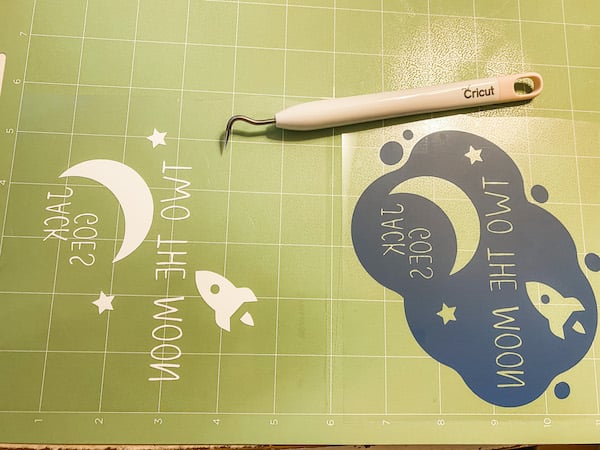
After trying to take small pieces off a piece of vinyl that is curling and moving all over the place, you will definitely want to do this!
After you have cut your vinyl on the mat, leave it there to take off all of the pieces not in your design (this is called weeding). Use your tweezers and weeding tool. Having your vinyl stay in place while you do this makes a huge difference!
Conclusion
I hope this information is helpful as you get started on your next Cricut craft project!
Let me know in the comments what you plan to make next and if you have any great tips to share. Enjoy your Cricut machine, and happy crafting!